- Published on
Cloud Container Hosting with Portainer & Traefik
Overview
In this comprehensive guide, you will learn how to harness the power of Portainer and Traefik on your AWS EC2 or Compute instance to efficiently manage containerized applications and expose them to the world. Whether you're a beginner or an experienced cloud enthusiast, this step-by-step tutorial will walk you through the entire process, from initial setup to advanced configurations.
Prereqs:
- Cloud Compute Instance: You'll need a compute instance from a cloud provider. For this guide, we'll use Oracle Cloud, which generously offers a free, lifelong tier with 4 vCPUs, 24GB of memory, and 200GB of storage.
- Domain Name: To access your containerized applications using Traefik as a reverse proxy, you'll need a domain name. This domain will act as the gateway to your hosted services, providing a user-friendly and accessible experience. Make sure you have your domain ready to configure in later steps.
Table of Content
- Prereqs:
- Setting up a new compute instance (Skip if not using oracle cloud)
- Installing docker
- Install and configure portainer
- Configuring Traefik
- Using up traefik
Setting up a new compute instance (Skip if not using oracle cloud)
I will be using Oracle Cloud as they provide a compute instance for life (as of 2022).
Warning: Oracle cloud only provides free 4vCPU, 24GB Mem, 200GB Storage computation betweem all the instances for life.
Head to Compute Instance once login and click on the Create Instance button. You can leave almost everything to the default except the Shape section. Change the shape series to Ampere, select the VM.Standard.A1.Flex (Always Free-Eligible) and configure the OCPUs to 4 and memory to 24GB.
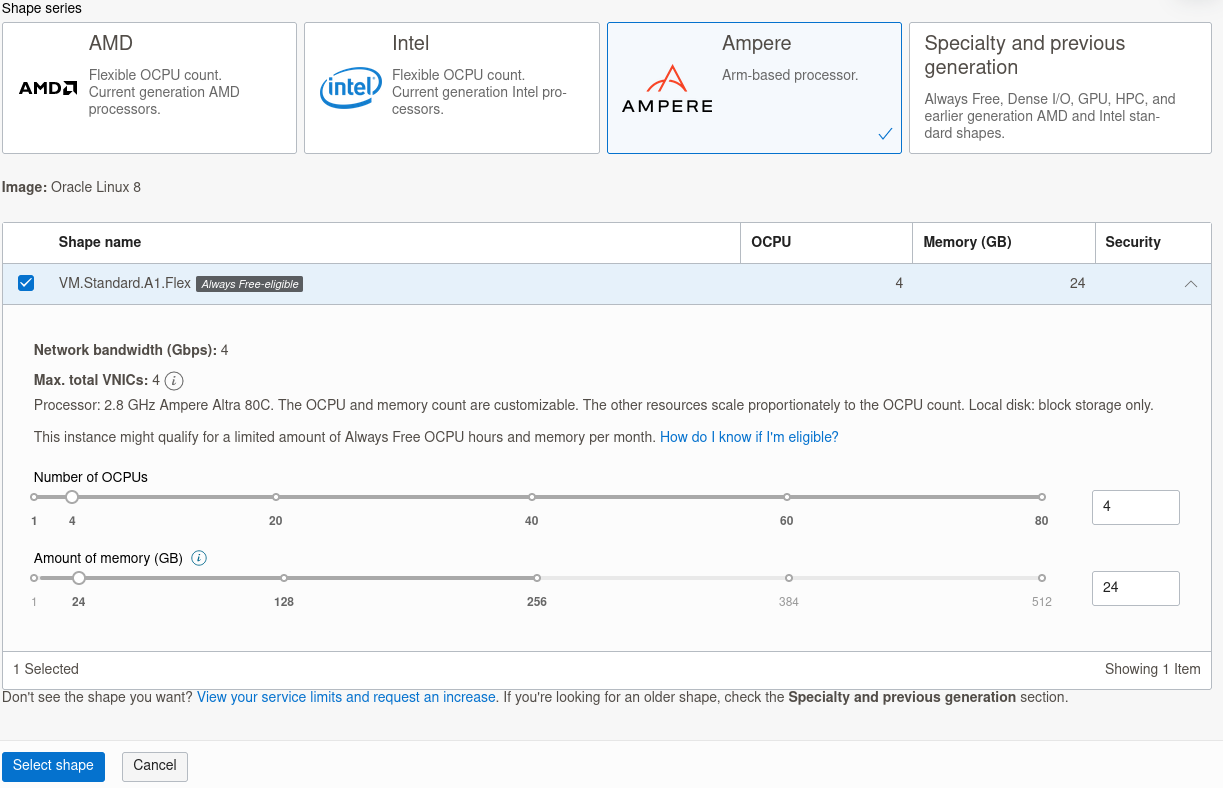
Make sure to download your private and public key, once done you can set the bool volume to 200GB to make full use of their free perks and then create the instance.
To ssh into your compute instance once it's up. You first need to change to permission of your private key by running the sudo chmod 400 <your downloaded private key>, then you can ssh into it by running the command ssh opc@<your compute public ip address> -i <your downloaded private key>.
Run the following command to update the system, sudo dnf update -y.
Installing docker
Run the following commands in order to update the system and install docker
# Updates the system
sudo yum update -y

# Install the required deps
sudo yum install -y yum-utils

# Add docker repository to system
sudo yum-config-manager --add-repo https://download.docker.com/linux/centos/docker-ce.repo

# Install docker
sudo yum install docker-ce docker-ce-cli containerd.io -y

# Enable and start docker
sudo systemctl start docker
sudo systemctl enable docker

# Run docker as non-root
sudo groupadd docker
sudo usermod -aG docker $USER
sudo newgrp docker
You should be able to run docker ps without any issue after running the commands above.
Install and configure portainer
Before we install and run portainer, we should first create a persistent volume by running docker volume create portainer_data. This will enable to rerun from the backup incase the container somehow crashes.
To run and start portianer just run docker run -d -p 9000:9000 --name=portainer --restart=always -v /var/run/docker.sock:/var/run/docker.sock -v portainer_data:/data portainer/portainer-ce. This will run the portainer-ce image in the background named portainer with port 9000 exposed to access the UI. We also linked the container with both the created persistent volume and local docker so that portainer has access to docker.
Exposing Portainer
To access portainer from the cloud, we will need to expose port 9000 on both the system and network to the world. You can expose it from the system just by running sudo firewall-cmd --zone=public --add-port=9000/tcp.
To expose it over the network, under your compute instance dashboard. Click on your subnet under the Primary VNIC section. Afterwards click on your Default Security List under the Security Lists section.
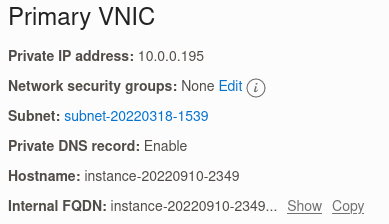
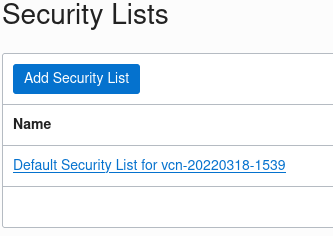
Under the Ingress Rules section, click the Add Ingress Rules button and expose port 9000 by inputing it in the Destination Port Range. An example is shown below.
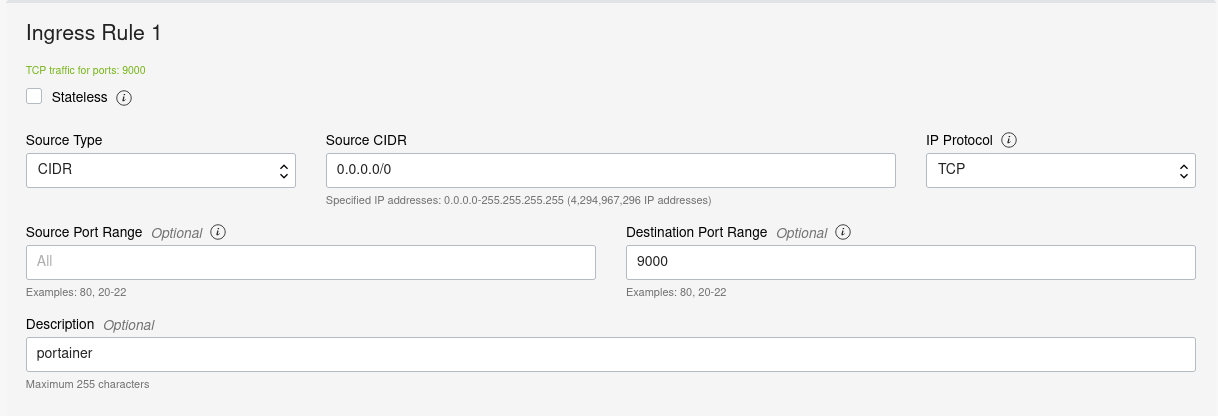
Once done, you can access it by typing your public ip address at port 9000 (<your public ip address:9000). You should be welcome to a portainer page asking to set your username and password.
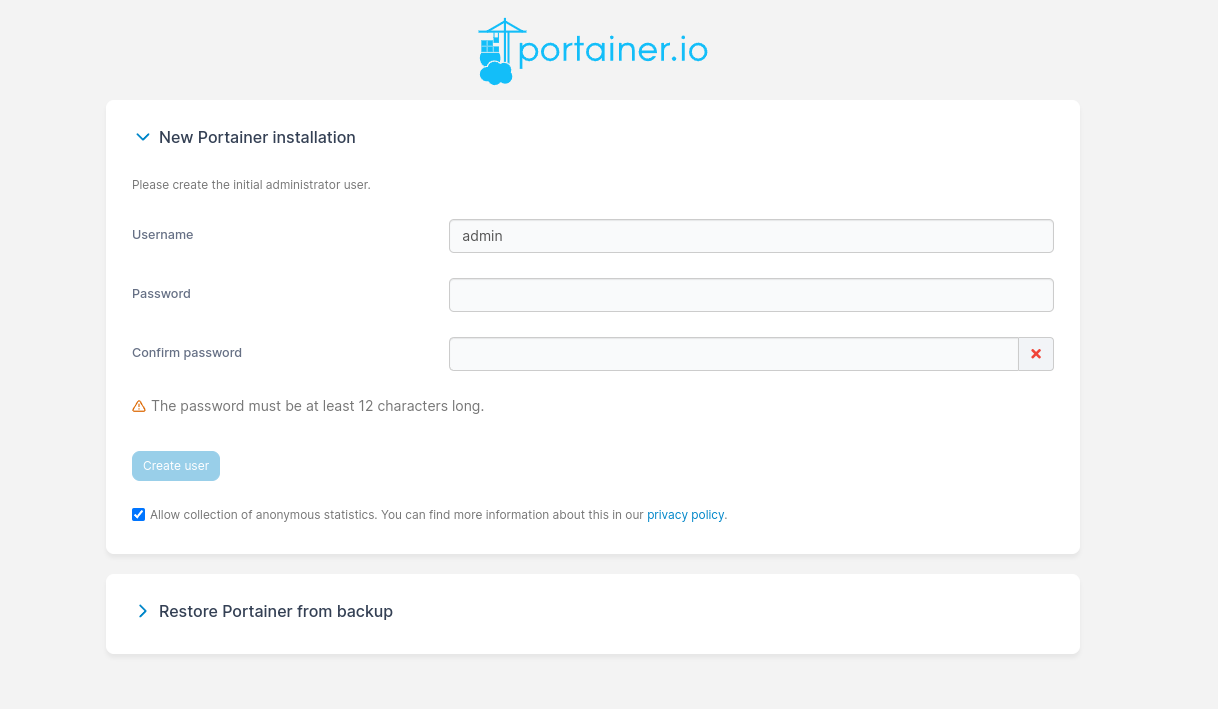
After setting up your portainer account, you should be shown the Environment Wizard page. You can click Get Started to finally use portainer!
Configuring Traefik
First create a traefik folder in your /etc directory by running the command sudo mkdir /etc/traefik. Then create a traefik.yml file inside the newly create folder and copy the content shown below. The only thing that needs to be edited is the email part, change youremail@gmail.com to your email. This will associate your email with the certificate letsencrypt will provide you for https.
global:
  checkNewVersion: true
  sendAnonymousUsage: false

api:
  dashboard: true
  insecure: true

entryPoints:
  web:
    address: :80
    http:
      redirections:
        entryPoint:
          to: websecure
          scheme: https

  websecure:
    address: :443

certificatesResolvers:
  staging:
    acme:
      email: youremail@gmail.com
      storage: /etc/traefik/certs/acme.json
      caServer: 'https://acme-staging-v02.api.letsencrypt.org/directory'
      httpChallenge:
        entryPoint: web

  production:
    acme:
      email: youremail@gmail.com
      storage: /etc/traefik/certs/acme.json
      caServer: 'https://acme-v02.api.letsencrypt.org/directory'
      httpChallenge:
        entryPoint: web

providers:
  docker:
    exposedByDefault: false # Default is true
  file:
    directory: /etc/traefik
    watch: true
After creating the traefik.yml file, you will need to create a directory at /etc/traefik/certs. That will be the location where you certs from letsencrypt be placed. You can make the directory by running the following commands.
sudo mkdir -p /etc/traefik/certs
Using up traefik
Login to your portianer.io dashboard and go into Stacks. Click the blue Add stack button and just name traefik or whatever name you want. Then paste the yml file from below into the web editor and then you can finally deploy the stack.
version: '3'

volumes:
  traefik-ssl-certs:
    driver: local

services:
  traefik:
    image: 'traefik:v2.5'
    container_name: 'traefik'
    ports:
      - '80:80'
      - '443:443'
      - '8080:8080'
    volumes:
      - /etc/traefik:/etc/traefik
      - traefik-ssl-certs:/ssl-certs
      - /var/run/docker.sock:/var/run/docker.sock:ro
Using Traefik
To use traefik with your containers, you will only need to update the labels when creating deploying it on portianer. Let's say you want to deploy a react app that is listening on port 3000, you will put in the image name and required environment variables like usually. Afterwards, you will add in custom traefik labels as shown below and set the network to traefik_default.
traefik.enable: true
traefik.http.routers.index.entrypoints: web, websecure
traefik.http.routers.index.rule: Host(`<your-url-that-you-want-to-link-to`)
traefik.http.routers.index.tls: true
traefik.http.routers.index.tls.certresolver: production     # put staging if you want to test
traefik.http.services.index.loadbalancer.server.port: 3000  # port to your app
Once done and running, you can visit your url that you link the container to. It will take a while for the https to take effect.